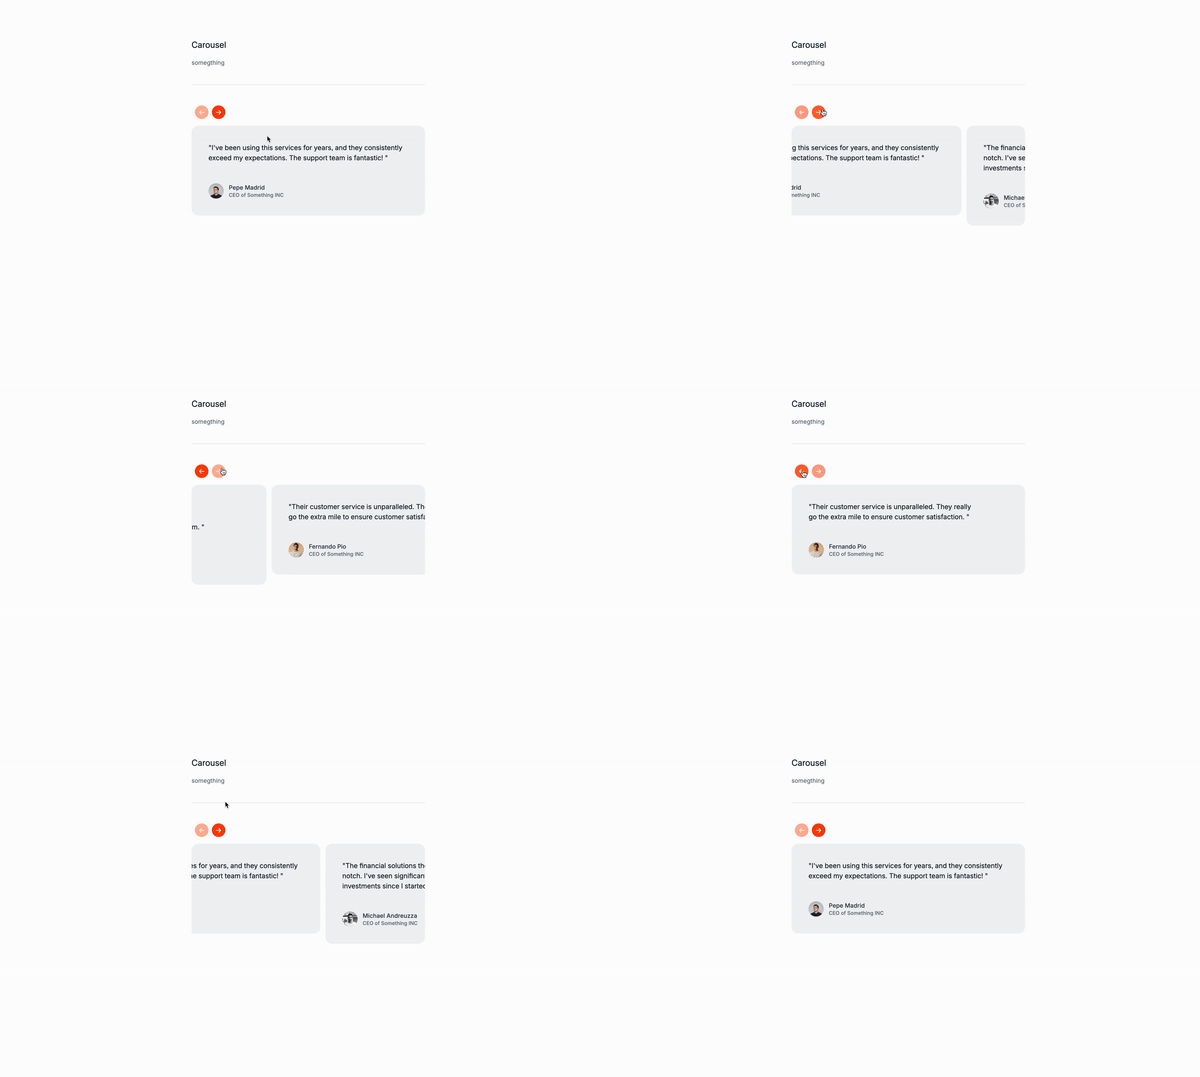
Let’s recreate a carousel with Tailwind CSS and JavaScript. Same thing as the previous with Alpine.js, but with JavaScript.
Why a carousel?
A carousel is a type of slider that displays a series of images or content in a continuous loop. It is commonly used in web design to showcase multiple images or content in a single page. The carousel allows users to easily navigate through the content and view it in a visually appealing way.
Use Cases:
- Product listings: A carousel can be used to showcase a series of products in a single page, allowing users to easily navigate through the products and view them in a visually appealing way.
- Blog posts: A carousel can be used to showcase a series of blog posts in a single page, allowing users to easily navigate through the blog posts and view them in a visually appealing way.
- News articles: A carousel can be used to showcase a series of news articles in a single page, allowing users to easily navigate through the news articles and view them in a visually appealing way.
- Image galleries: A carousel can be used to showcase a series of images in a single page, allowing users to easily navigate through the images and view them in a visually appealing way.
- Video galleries: A carousel can be used to showcase a series of videos in a single page, allowing users to easily navigate through the videos and view them in a visually appealing way.
Let’s get started
Understanding the code:
Structure
- ìd=“carousel”: This is the id of the carousel. It is used to identify the carousel in JavaScript.
- aria-labelledby=“carousel-label” role=“region” tabindex=“0”: This is the ARIA attributes that will be used to make the carousel accessible.
The buttons
<button id="prevButton" tabindex="0">: This is the button that will be used to navigate to the previous slide.<button id="nextButton" tabindex="0">: This is the button that will be used to navigate to the next slide.
The slides container
<div aria-labelledby="carousel-label" role="region" tabindex="0">: This is the container that will be used to display the slides. It has the ARIA attributes that will be used to make the slides accessible.
The slides
role="option": This is the ARIA attribute that will be used to make the slides accessible. Here is where the content of the slides will be placed.
<div id="carousel">
<div aria-labelledby="carousel-label" role="region" tabindex="0">
<div>
<button id="prevButton" tabindex="0">
<span aria-hidden="true">←</span>
<span class="sr-only">Skip to previous slide page</span>
</button>
<button id="nextButton" tabindex="0">
<span aria-hidden="true">→</span>
<span class="sr-only">Skip to next slide page</span>
</button>
</div>
<ul class=" snap-mandatory snap-x" aria-labelledby="carousel-content-label" role="listbox" tabindex="0" id="slider">
<li role="option">
<!--- Slide content goes here -->
</li>
</ul>
</div>
</div>the script
The event listener
document.addEventListener("DOMContentLoaded", () => {: This is the event listener that will be used to add the event listeners to the carousel.const slider = document.getElementById("slider");: This is the code that will be used to get the slider element.const prevButton = document.getElementById("prevButton");: This is the code that will be used to get the previous button element.const nextButton = document.getElementById("nextButton");: This is the code that will be used to get the next button element.let skip = 1;: This is the code that will be used to set the skip value.
The update button state function
const updateButtonState = () => {: This is the code that will be used to update the button state.const atBeginning = slider.scrollLeft === 0;: This is the code that will be used to check if the carousel is at the beginning.const atEnd = slider.scrollLeft + slider.clientWidth >= slider.scrollWidth;: This is the code that will be used to check if the carousel is at the end.prevButton.classList.toggle("opacity-50", atBeginning);: This is the code that will be used to toggle the opacity of the previous button.prevButton.setAttribute("aria-disabled", atBeginning);: This is the code that will be used to set the aria-disabled attribute of the previous button.prevButton.setAttribute("tabindex", atBeginning ? "-1" : "0");: This is the code that will be used to set the tabindex of the previous button.nextButton.classList.toggle("opacity-50", atEnd);: This is the code that will be used to toggle the opacity of the next button.nextButton.setAttribute("aria-disabled", atEnd);: This is the code that will be used to set the aria-disabled attribute of the next button.nextButton.setAttribute("tabindex", atEnd ? "-1" : "0");: This is the code that will be used to set the tabindex of the next button.
The scroll to function
const scrollTo = (strategy) => {: This is the code that will be used to scroll the carousel.let current = slider.scrollLeft;: This is the code that will be used to get the current scroll position of the carousel.let offset = slider.firstElementChild.getBoundingClientRect().width;: This is the code that will be used to get the width of the first slide.slider.scrollTo({: This is the code that will be used to scroll the carousel.left: strategy(current, offset),: This is the code that will be used to set the scroll position of the carousel.behavior: "smooth",: This is the code that will be used to set the scroll behavior.
The next and prev functions
const next = () => scrollTo((current, offset) => current + offset * skip);: This is the code that will be used to scroll the carousel to the next slide.const prev = () => scrollTo((current, offset) => current - offset * skip);: This is the code that will be used to scroll the carousel to the previous slide.
The event listeners
prevButton.addEventListener("click", prev);: This is the code that will be used to add the event listener to the previous button.nextButton.addEventListener("click", next);: This is the code that will be used to add the event listener to the next button.slider.addEventListener("scroll", updateButtonState);: This is the code that will be used to add the event listener to the carousel.updateButtonState();: This is the code that will be used to update the button state.
document.addEventListener("DOMContentLoaded", () => {
const slider = document.getElementById("slider");
const prevButton = document.getElementById("prevButton");
const nextButton = document.getElementById("nextButton");
let skip = 1;
const updateButtonState = () => {
const atBeginning = slider.scrollLeft === 0;
const atEnd =
slider.scrollLeft + slider.clientWidth >= slider.scrollWidth;
prevButton.classList.toggle("opacity-50", atBeginning);
prevButton.setAttribute("aria-disabled", atBeginning);
prevButton.setAttribute("tabindex", atBeginning ? "-1" : "0");
nextButton.classList.toggle("opacity-50", atEnd);
nextButton.setAttribute("aria-disabled", atEnd);
nextButton.setAttribute("tabindex", atEnd ? "-1" : "0");
};
const scrollTo = (strategy) => {
let current = slider.scrollLeft;
let offset = slider.firstElementChild.getBoundingClientRect().width;
slider.scrollTo({
left: strategy(current, offset),
behavior: "smooth",
});
};
const next = () => scrollTo((current, offset) => current + offset * skip);
const prev = () => scrollTo((current, offset) => current - offset * skip);
prevButton.addEventListener("click", prev);
nextButton.addEventListener("click", next);
slider.addEventListener("scroll", updateButtonState);
updateButtonState();
});Conclusion
This is a simple carousel that can be used for any type of content, such as a product listing, blog posts, news articles, or image galleries. The code is easy to understand and the structure is clear. The use of Tailwind CSS and JavaScript makes it easy to style the carousel and add interactivity. Remeber to make it as accessible as possible, and you’re good to go!
Hope you enjoyed this tutorial and have a great day!
/Michael Andreuzza
One price.
Lifetime access.
-
34 Premium Astro Templates
-
All Future Templates Included
-
Unlimited Projects · Lifetime License
