How can we usetag inputs in our UIs and why do we need them
Tag inputs are a great way to add tags to a list. They are used in many different applications, such as social media, to allow users to add new tags to a post.
Advantages of tag inputs:
They are easy to use and understand
They can be customized to fit the needs of the application
They can be used to add tags to a list
They can be used to filter content
They can be used to search for content
They can be used to create a tag cloud
They can be used to create a tag suggestion system
They can be used to create a tag autocomplete system
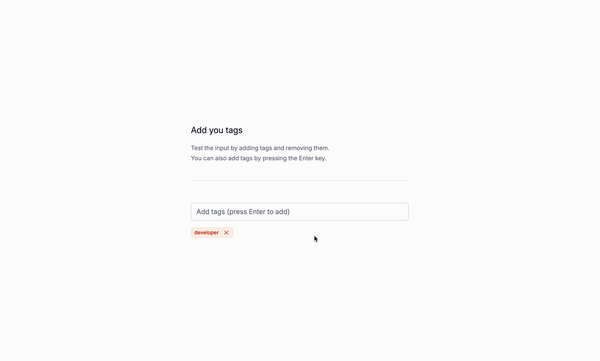
Let’s create a tag input
The structure of the tag input
The important part of the code
The x-data attribute is used to define the data of the component
The x-for attribute is used to loop through the tags array
The :key attribute is used to uniquely identify each item in the loop
The x-text attribute is used to display the value of the tag variable
The @click attribute is used to add a new tag to the tags array when the user clicks the close button
Note: The classes are remove for clarity.
<div x-data="{ tags: [], addTag(tag) { if (tag.trim() !== '') { this.tags.push(tag.trim()); } }, removeTag(index) { this.tags.splice(index, 1); } }"> <!-- Tag Input --> <div class="w-full" x-data="{ newTag: '', tags: [] }"> <!-- Input Field --> <input x-model="newTag" @keydown.enter.prevent=" if (newTag.trim() !== '') { tags.push(newTag.trim()); newTag = ''; } " type="text" placeholder="..." /> <!-- Tags will be added here --> <div> <template x-for="(tag, index) in tags" :key="index"> <div > <span x-text="tag"></span> <button @click="tags.splice(index, 1)" class="ml-2"> <!--- Close Icon goes here --> </button> </div> </template> </div> </div></div>
Hope you enjoyed this tutorial.
/Michael Andreuzza
Did you like this tutorial? Please share it with your friends!
Astro v5
/
Tailwind CSS v4
One Price. Lifetime Access.
33 Premium Astro Templates
All Future Templates Included
Unlimited Projects · Lifetime License
Fastest product ever paid. Keep up the great work — Raf, RafWorks
The value in this is incredible. Every single one of the themes is a piece of art — Dan Mindru, Clobbr
Big fan of your themes. They're well-organized, look clean, and are fast — Keving Focke, Developer
Michael has been dropping some amazing premium themes for Astro lately — Fred Schott, Astro