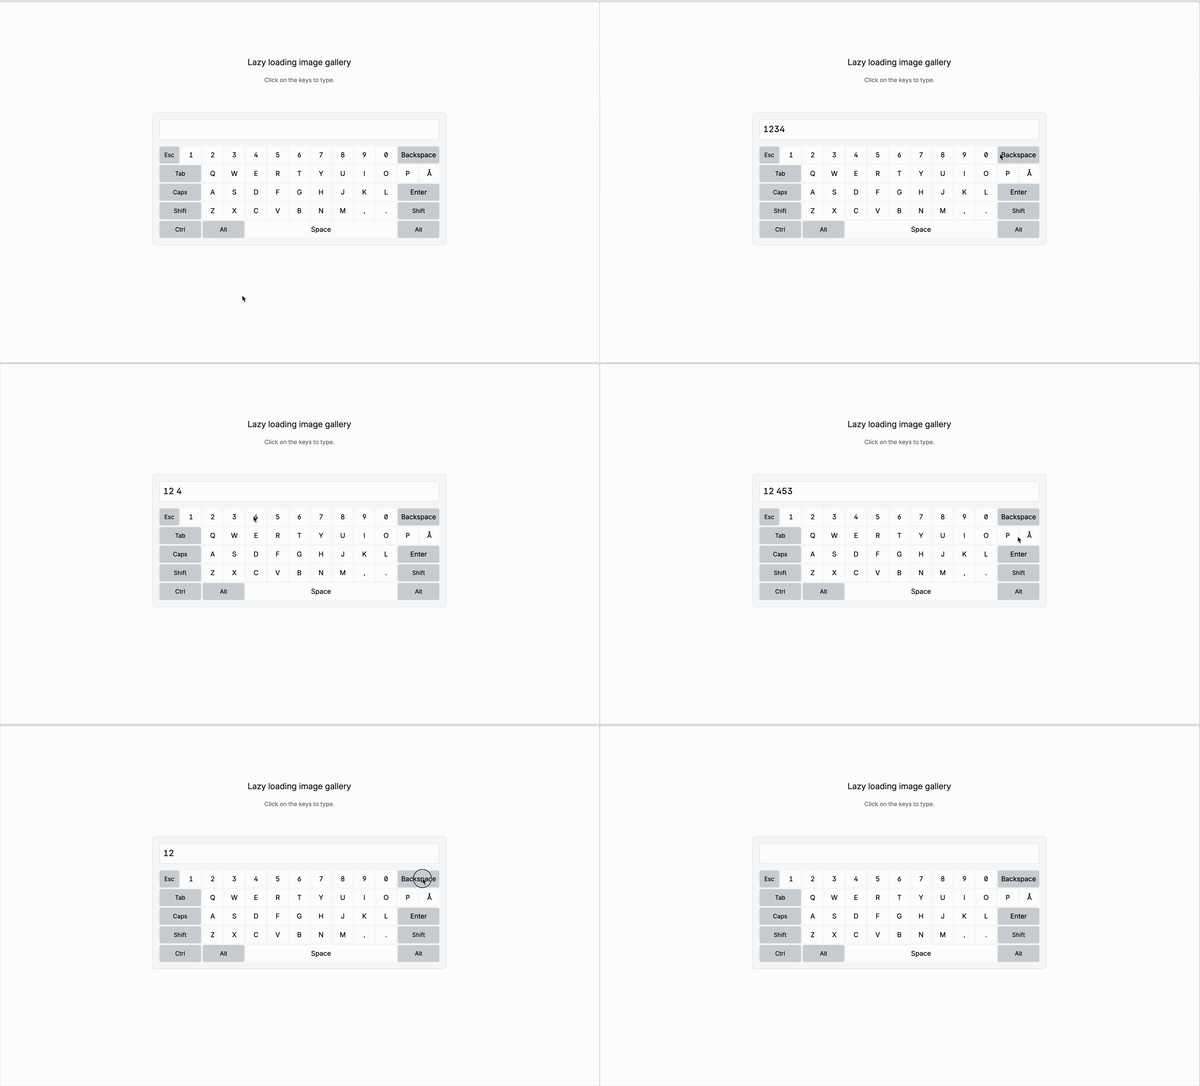
Good Monday everyone! Today we are going to create a virtual keyboard with Tailwind CSS and JavaScript, a fun project to learn about JavaScript and how to use it to create a virtual keyboard.
What is a virtual keyboard?
A virtual keyboard is a software application that simulates the behavior of a physical keyboard. It allows users to type text on a computer or mobile device without having to physically press keys. Virtual keyboards are commonly used in applications that require text input, such as word processors, email clients, and web browsers.
Use cases
Virtual keyboards are used in various contexts and offer practical solutions for different needs:
-
Touchscreen Devices: On smartphones and tablets, virtual keyboards are the primary input method, allowing users to type without physical keys.
-
Accessibility: Virtual keyboards are helpful for users with physical disabilities who may not be able to use a traditional keyboard, providing an alternative for typing via a mouse, stylus, or even eye-tracking systems.
-
Kiosks and Public Terminals: In settings like ATMs, self-checkout machines, and information kiosks, virtual keyboards allow for user input without the need for a traditional keyboard, often with touchscreens.
-
Multilingual Typing: Virtual keyboards often support multiple languages, making it easier to switch between different language inputs without changing hardware.
-
Enhanced Security: Some online banking systems use virtual keyboards to prevent keylogging malware from capturing typed passwords or other sensitive information.
-
Gaming: Virtual keyboards can be used in gaming applications, especially in virtual reality (VR) environments, where traditional keyboards aren’t practical.
Building the keyboard
We are going to start by extending the grid template columns on the config file, we are going to need more columns to accommodate the keyboard keys.
gridTemplateColumns: This property allows you to define the width of the grid columns. You can specify the number of columns you want to use, and the width of each column. You can either extend the theme or just use it as default.
/** @type {import('tailwindcss').Config} */
module.exports = {
theme: {
gridTemplateColumns: {
1: "repeat(1, minmax(0, 1fr))",
2: "repeat(2, minmax(0, 1fr))",
3: "repeat(3, minmax(0, 1fr))",
4: "repeat(4, minmax(0, 1fr))",
5: "repeat(5, minmax(0, 1fr))",
6: "repeat(6, minmax(0, 1fr))",
7: "repeat(7, minmax(0, 1fr))",
8: "repeat(8, minmax(0, 1fr))",
9: "repeat(9, minmax(0, 1fr))",
10: "repeat(10, minmax(0, 1fr))",
11: "repeat(11, minmax(0, 1fr))",
12: "repeat(12, minmax(0, 1fr))",
13: "repeat(13, minmax(0, 1fr))",
// More if needed
}
}
}The structure
We are going to create a few rows with the keys and give this ones a grid of 13 columns, this will allow us to have more space to comodate the keys. as you can see is not a full keyboard, just a small exmaple.
The wrapper
Id’s
virtual-keyboard: This is the id of the wrapper, it will be used to target the element with the id ofvirtual-keyboardin the JavaScript file.
The output display
Id’s
keyboard-output: This is the id of the output display, it will be used to target the element with the id ofkeyboard-outputin the JavaScript file.
The buttons
Classes
key: This is the class of the buttons, it will be used to target the buttons with the class ofkeyin the JavaScript file.
<div id="virtual-keyboard">
<!-- Keyboard Output Display -->
<div id="keyboard-output"></div>
<!-- Keyboard Layout -->
<div class="grid gap-1">
<!-- Number Row -->
<div class="grid grid-cols-13 gap-1">
<button class="key">Esc</button>
<button class="key">1</button>
<button class="key">2</button>
<button class="key">3</button>
<button class="key">4</button>
<button class="key">5</button>
<button class="key">6</button>
<button class="key">7</button>
<button class="key">8</button>
<button class="key">9</button>
<button class="key">0</button>
<button class="key"
>Backspace</button
>
</div>
<!-- Add more rows here -->
</div>
</div>Getting the keys
We are going to get the keys from the buttons and add them to the output display.
Adding the click event listener
We are going to add a click event listener to the keyboard container, this will allow us to detect when a key is clicked and add it to the output display.
keyboard.addEventListener("click", function (e) {: This line of code will add an event listener to the keyboard container, the function will be executed when the event is triggered.if (e.target.classList.contains("key")) {: This line of code will check if the clicked element is a key, if it is, it will execute the code inside the curly braces.const key = e.target.textContent;: This line of code will get the text content of the clicked element, which is the key.switch (key) {: This line of code will start a switch statement, which will allow us to handle different key actions.case "Backspace":: This line of code will check if the key is “Backspace”, if it is, it will execute the code inside the curly braces.output.textContent = output.textContent.slice(0, -1);: This line of code will remove the last character from the output display.case "Enter":: This line of code will check if the key is “Enter”, if it is, it will execute the code inside the curly braces.output.textContent += "\n";: This line of code will add a new line to the output display.case "Space":: This line of code will check if the key is “Space”, if it is, it will execute the code inside the curly braces.output.textContent += " ";: This line of code will add a space to the output display.case "Tab":: This line of code will check if the key is “Tab”, if it is, it will execute the code inside the curly braces.case "Caps":: This line of code will check if the key is “Caps”, if it is, it will execute the code inside the curly braces.case "Shift":: This line of code will check if the key is “Shift”, if it is, it will execute the code inside the curly braces.case "Ctrl":: This line of code will check if the key is “Ctrl”, if it is, it will execute the code inside the curly braces.case "Alt":: This line of code will check if the key is “Alt”, if it is, it will execute the code inside the curly braces.case "Esc":: This line of code will check if the key is “Esc”, if it is, it will execute the code inside the curly braces.default:: This line of code will be executed if the key is not one of the above cases.output.textContent += key;: This line of code will add the key to the output display.
The full script
// Get the keyboard container and output display
const keyboard = document.getElementById("virtual-keyboard");
const output = document.getElementById("keyboard-output");
// Add click event listener to the keyboard container
keyboard.addEventListener("click", function (e) {
// Check if the clicked element is a key
if (e.target.classList.contains("key")) {
const key = e.target.textContent;
// Handle different key actions
switch (key) {
case "Backspace":
output.textContent = output.textContent.slice(0, -1);
break;
case "Enter":
output.textContent += "\n";
break;
case "Space":
output.textContent += " ";
break;
case "Tab":
case "Caps":
case "Shift":
case "Ctrl":
case "Alt":
case "Esc":
// These keys don't produce output
break;
default:
output.textContent += key;
}
}
});Conclusion
This is a simple virtual keyboard that you can recreate with Tailwind CSS and JavaScript. You can customize the keyboard layout and style to fit your needs. Before using it in your project, make sure to test it thoroughly to ensure that it works as expected and it’s accessible to all users.
Hope you enjoyed this tutorial and have a good day!
/Michael Andreuzza
One Price.
Lifetime Access.
-
32 Premium Astro Templates
-
All Future Templates Included
-
Unlimited Projects · Lifetime License
