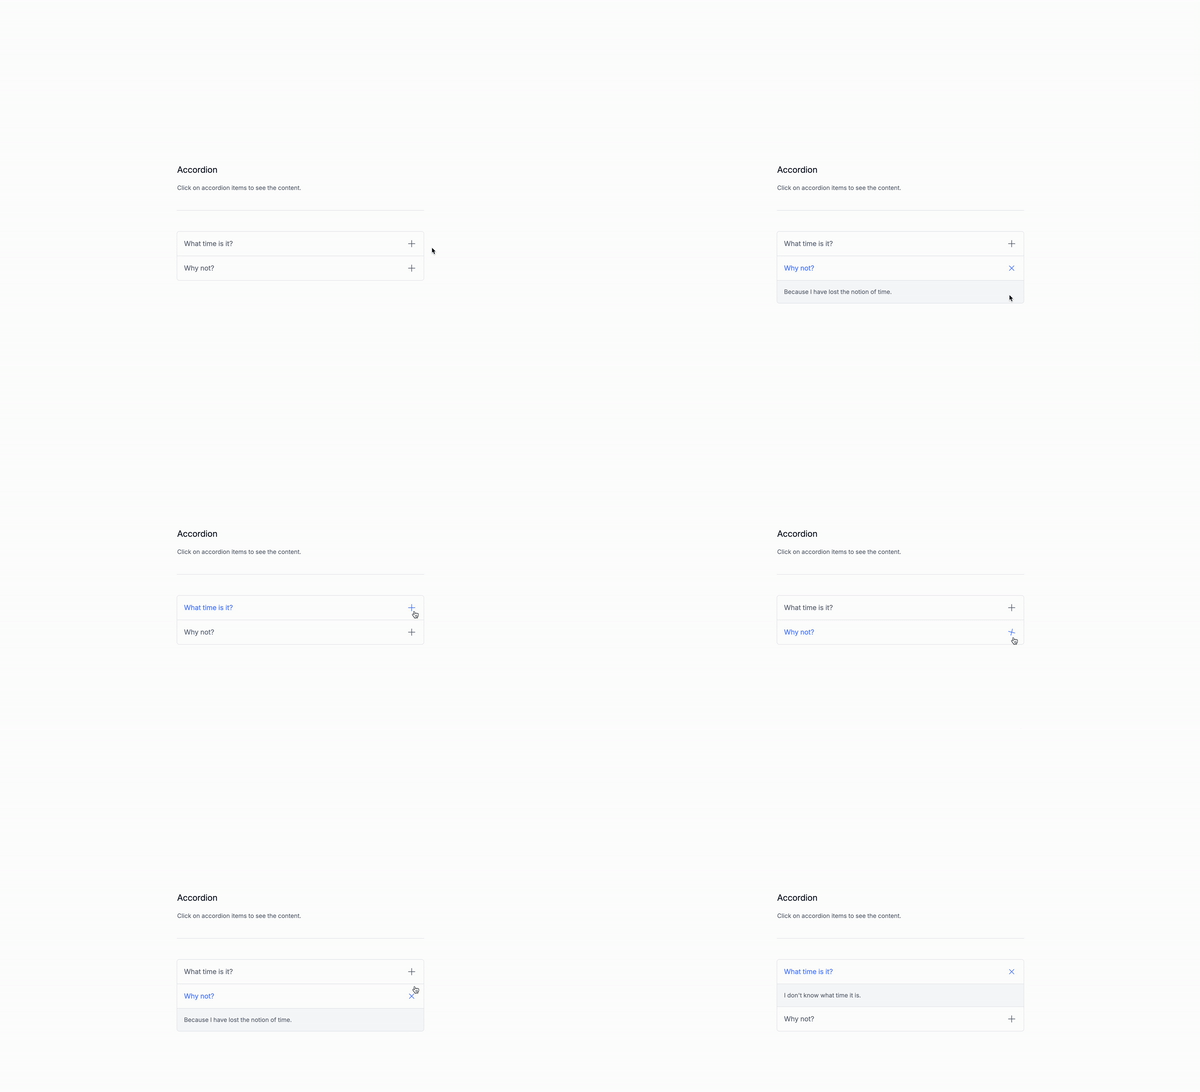
Today, we are going to build a the accoridon we did with Tailwind CSS and AlpineJS but with JavaScript.
A quick refresh of what accordions are?
An accordion is a way to display a list of items that can be expanded and collapsed, it also saves space by not displaying all the items at once. It’s a great way to organize information and make it easier to read, especially for longer lists.
Use Cases:
- Product lists: For example, a product list can be displayed in an accordion to showcase different products.
- Service lists: A service list can be displayed in an accordion to showcase different services.
- FAQs: An accordion can be used to display frequently asked questions (FAQs).
- News: An accordion can be used to display news articles or blog posts.
- Documentation: An accordion can be used to display documentation or instructions.
Let’s build the structure
Understanding the code:
The first button
id="accordion": This is the ID of the accordion container.id="accordionBtn1": This is the ID of the button that opens the first accordion item.class="accordion-btn": This is the class that will be applied to the button that opens the accordion.class="accordion-icon": This is the class that will be applied to the SVG icon inside the button.id="accordionIcon1": This is the ID of the SVG icon that will be used to open the first accordion item.id="accordionContent1": This is the ID of the content that will be displayed when the first accordion item is opened.
The second button
id="accordionBtn2": This is the ID of the button that opens the second accordion item.class="accordion-btn": This is the class that will be applied to the button that opens the accordion.class="accordion-icon": This is the class that will be applied to the SVG icon inside the button.id="accordionIcon2": This is the ID of the SVG icon that will be used to open the second accordion item.id="accordionContent2": This is the ID of the content that will be displayed when the second accordion item is opened.
Classes are removed for brevity, but I’ll keep those classes relevant to the tutorial.
<div
id="accordion">
<!-- Accordion Item 1 -->
<div>
<button
id="accordionBtn1"
class="accordion-btn">
<span>What time is it?</span>
<svg
class="accordion-icon ..."
id="accordionIcon1">
<!---- SVG path goes here --->
</svg>
</button>
<div
id="accordionContent1"
class="accordion-content ... hidden">
I don't know what time it is.
</div>
</div>
<!-- Accordion Item 2 -->
<div>
<button
id="accordionBtn2"
class="accordion-btn ...">
<span>Why not?</span>
<svg
class="accordion-icon ..."
id="accordionIcon2">
<!---- SVG path goes here --->
</svg>
</button>
<div
id="accordionContent2"
class="accordion-content ... hidden">
Because I have lost the notion of time.
</div>
</div>
<!-- Add more Items here -->
</div>The script
Understanding the code:
Event Listener Setup:
document.addEventListener("DOMContentLoaded", function() {: This is the event listener that will be triggered when the page is loaded.
Query Selectors:
const accordionBtns = document.querySelectorAll(".accordion-btn");: This is the query selector that will select all the buttons inside the accordion container.const accordionIcons = document.querySelectorAll(".accordion-icon");: This is the query selector that will select all the SVG icons inside the accordion container.const accordionContents = document.querySelectorAll(".accordion-content");: This is the query selector that will select all the content inside the accordion container.
Button Click Event:
accordionBtns.forEach((btn, index) => {: This is the forEach loop that will iterate over each button inside the accordion container.btn.addEventListener("click", () => {: This is the event listener that will be triggered when a button is clicked.toggleAccordion(index);: This is the function that will be called when a button is clicked.
Toggle Accordion Function:
function toggleAccordion(index) {: This is the function that will be called when a button is clicked.
SVG Icon Loop:
accordionIcons.forEach((icon, i) => {: This is the forEach loop that will iterate over each SVG icon inside the accordion container.if (i === index) {: This is the condition that will be checked when the index of the button is equal to the index of the SVG icon.icon.classList.toggle("rotate-45");: This is the function that will be called when the condition is true.
Content Loop:
accordionContents.forEach((content, i) => {: This is the forEach loop that will iterate over each content inside the accordion container.if (i === index) {: This is the condition that will be checked when the index of the button is equal to the index of the content.content.classList.toggle("hidden");: This is the function that will be called when the condition is true.content.classList.add("hidden");: This is the function that will be called when the condition is false.
The full script:
document.addEventListener("DOMContentLoaded", function() {
const accordionBtns = document.querySelectorAll(".accordion-btn");
const accordionIcons = document.querySelectorAll(".accordion-icon");
const accordionContents = document.querySelectorAll(".accordion-content");
accordionBtns.forEach((btn, index) => {
btn.addEventListener("click", () => {
toggleAccordion(index);
});
});
function toggleAccordion(index) {
accordionIcons.forEach((icon, i) => {
if (i === index) {
icon.classList.toggle("rotate-45");
} else {
icon.classList.remove("rotate-45");
}
});
accordionContents.forEach((content, i) => {
if (i === index) {
content.classList.toggle("hidden");
} else {
content.classList.add("hidden");
}
});
}
});Conclusion
In this tutorial, we learned how to create an accordion with Tailwind CSS and JavaScript. We covered the basics of HTML, CSS, and JavaScript, and we also learned how to use Tailwind CSS to style the accordion. We also explored how to use JavaScript to toggle the visibility of the accordion items and the SVG icons. By following these steps, you can create a custom accordion that fits your needs and style preferences.
Do not forget to make fully accessible for all users, and to test your code on different devices and browsers to ensure that it works correctly.
Hope you enjoyed this tutorial and have a good day
/Michael Andreuzza
One price.
Lifetime access.
-
34 Premium Astro Templates
-
All Future Templates Included
-
Unlimited Projects · Lifetime License
